If you’ve ever felt overwhelmed by Photoshop’s endless tools and options, you’re not alone. As digital creativity surges in 2024, mastering the basics has become more essential than ever for designers, marketers, and hobbyists alike.
Whether you’re aiming to enhance your photos or craft stunning graphics, getting a solid grip on Photoshop fundamentals will save you countless hours and frustration.
In this post, I’ll walk you through essential tips that helped me speed up my learning curve and start creating confidently from day one. Ready to unlock your creative potential?
Let’s dive into the must-know basics that every beginner needs to get started fast.
Understanding the Photoshop Interface Without Feeling Lost
Breaking Down the Workspace Layout
When I first opened Photoshop, the interface felt like a cockpit filled with buttons, sliders, and panels everywhere. What really helped me was focusing on the key areas: the toolbar on the left, the options bar at the top, the canvas in the center, and the panels on the right.
Instead of trying to learn every single button at once, I concentrated on recognizing these main sections first. Getting comfortable with where things are makes the whole program feel way less intimidating.
Trust me, once you know your way around the workspace, you’ll find yourself navigating through projects much faster without second-guessing where tools hide.
Customizing Your Workspace for Efficiency
Photoshop allows you to adjust the workspace to fit your own flow. I personally found that rearranging panels to keep the ones I used most visible saved me tons of time.
For example, I always keep the Layers panel front and center because it’s where most of the magic happens. You can drag, dock, or even collapse panels to reduce clutter.
Plus, saving your customized workspace means you don’t have to reset it every time you open Photoshop. This small adjustment made a huge difference in how smoothly my creative process ran and helped me stay focused rather than distracted by unnecessary options.
Understanding Essential Tools and What They Do
Instead of feeling overwhelmed by the endless tools, I started by mastering just a handful that I knew I’d use all the time. Tools like Move, Brush, Eraser, and the Marquee selection are the backbone of most projects.
Once you get a feel for these, branching out becomes easier. For instance, learning the Brush tool’s settings lets you add unique textures or effects without diving into advanced features right away.
It’s about building confidence step-by-step. When I was starting out, I kept a quick reference list of tool icons and their functions nearby until I memorized them naturally through use.
Mastering Layers: Your Best Friend in Photoshop
Why Layers Are Game-Changers
One thing that completely transformed my Photoshop experience was understanding layers. Think of layers like transparent sheets stacked on top of each other, each holding different elements of your design or photo edit.
This means you can edit one part without messing up the rest. When I realized I could move, hide, or adjust individual layers independently, it unlocked so much creative freedom.
Layers make complex edits manageable and mistakes reversible, which is a lifesaver when you’re learning.
Working with Layer Masks for Non-Destructive Edits
Layer masks might sound intimidating at first, but they’re incredibly powerful once you get the hang of them. I used to worry about ruining my image when erasing parts, but masks let you hide or reveal parts of a layer without deleting any pixels.
This non-destructive method means you can tweak or reverse changes anytime. Playing around with black, white, and gray brushes on masks gave me precise control over what showed or disappeared in my design, making edits feel much less risky and way more fun.
Organizing Layers with Groups and Naming
When you start working on bigger projects, layers can pile up quickly. I learned the hard way that keeping layers named and grouped is a huge time saver.
Grouping layers related to the same object or effect keeps your panel tidy and helps you find things instantly. Naming layers with clear, descriptive titles prevents confusion later on.
For example, instead of “Layer 12,” I’d rename it to “Background Shadows” or “Text Highlights.” This habit made revisiting old projects less frustrating and sped up my workflow when switching between tasks.
Getting Comfortable with Selections and Masks
Mastering Basic Selections: Marquee, Lasso, and Quick Selection
Selections are like magic wands that let you isolate parts of your image for editing. I started with the basics: Rectangular and Elliptical Marquee tools for simple shapes, then moved on to the Lasso for freehand selections.
The Quick Selection tool felt like a game-changer because it intelligently grabs edges, making selections way faster. At first, I struggled with precision, but practicing with feathering and refining edges helped me create smooth, natural cutouts.
Selections turned out to be foundational for everything from cropping objects to applying targeted effects.
Refining Selections for Professional Results
After making a selection, the “Select and Mask” workspace became my go-to for polishing edges. It lets you soften, smooth, or shift edges so your cutouts don’t look jagged or artificial.
I remember trying to cut out hair from a photo—without refining, it looked like a mess, but with these tools, the edges blended beautifully. Learning to refine selections was a game-changer in making edits look clean and realistic rather than amateurish.
It’s a skill worth dedicating time to because it pays off in professional-quality results.
Using Masks to Apply Effects Selectively
Once you have a selection, you can turn it into a mask to apply effects only where you want them. I often use this when brightening a face or blurring a background without affecting the entire image.
Masks offer flexibility because you can paint on them to add or remove areas from the effect. This selective editing gives you precise control over your composition, something that felt impossible before I fully embraced masking techniques.
Essential Adjustments to Enhance Your Images
Understanding Brightness, Contrast, and Levels
Adjusting brightness and contrast was one of the first things I learned to improve my photos quickly. These basic tweaks can make a dull image pop or fix overexposure.
Levels adjustment goes a step further by letting you control shadows, midtones, and highlights precisely. I found that playing with histogram sliders gave me much better control over tonal range than just brightness alone.
These adjustments are like seasoning your photo to taste—just a little tweak can make a huge difference in how vibrant and balanced the final image looks.
Color Correction Using Hue/Saturation and Color Balance
Colors can make or break your design, so mastering color correction was crucial. Hue/Saturation adjustment allows you to change specific colors or overall color intensity.
I used this a lot to fix skin tones or make skies bluer in photos. Color Balance lets you shift the shadows, midtones, and highlights toward cooler or warmer tones, which helped me create the mood I wanted.
These tools gave me the power to transform ordinary images into eye-catching visuals by simply tweaking colors thoughtfully.
Non-Destructive Editing with Adjustment Layers
One of the best habits I developed was always using adjustment layers instead of direct image adjustments. Adjustment layers let you apply changes like brightness, contrast, or color correction without permanently altering the original image.
This means you can go back and tweak or remove adjustments anytime, which is a lifesaver for experimentation. I recommend getting comfortable with this early because it keeps your workflow flexible and your edits reversible—perfect for beginners and pros alike.
Quick Tips for Efficient Workflow and Time-Saving
Using Keyboard Shortcuts to Speed Up Tasks
At first, I ignored keyboard shortcuts because they seemed like a hassle to memorize, but once I started using them, my productivity shot up. Simple shortcuts like pressing “V” for Move or “B” for Brush saved me precious seconds every time.
Photoshop has so many shortcuts, but focusing on the ones you use most often is the best way to start. I suggest printing out a cheat sheet or using on-screen hints until the shortcuts become second nature.
This small investment in learning shortcuts pays off big in cutting down your editing time.
Saving and Exporting Files Correctly
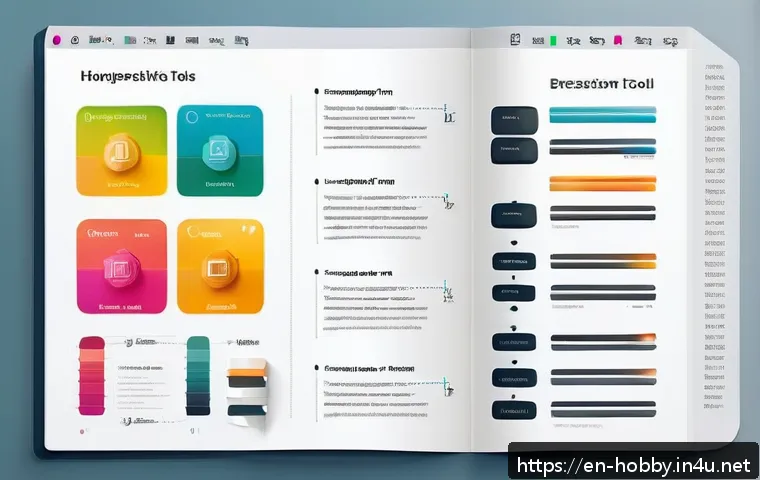
Beginners often overlook the importance of saving files properly, which I learned the hard way after losing hours of work. Photoshop’s native PSD format keeps all your layers and edits intact, so always save your working file in PSD.
When it’s time to share or upload, exporting as JPEG or PNG is usually best. JPEG compresses images for smaller file size but can lose quality, while PNG keeps transparency and sharpness but creates larger files.
Knowing when and how to save your work ensures your projects look great wherever they end up.
Utilizing Presets and Templates to Jumpstart Projects
Starting from scratch can be intimidating, but Photoshop offers presets and templates that speed up the creative process. Whether you’re making social media posts, flyers, or web graphics, these ready-made setups save you from fiddling with dimensions and layout basics.
I found that customizing templates helped me learn design principles on the fly while producing professional-looking results fast. It’s a smart way to get comfortable with the program and still deliver polished work, especially when deadlines loom.
Common Photoshop Tools and Their Primary Functions
| Tool | Main Use | Quick Tip |
|---|---|---|
| Move Tool | Move layers and objects around the canvas | Shortcut: V |
| Brush Tool | Paint and draw with customizable brushes | Adjust size with [ and ] keys |
| Marquee Tool | Select rectangular or elliptical areas | Hold Shift for perfect squares or circles |
| Lasso Tool | Freehand selection of areas | Hold Alt (Option on Mac) to subtract from selection |
| Quick Selection Tool | Quickly select areas based on color and texture | Use Refine Edge for smoother selections |
| Crop Tool | Trim and straighten images | Press Enter to apply crop |
| Clone Stamp Tool | Copy pixels from one area to another | Alt-click to sample source point |
| Eraser Tool | Erase parts of a layer | Use Layer Masks for non-destructive erasing |
Harnessing Filters and Effects for Creative Flair
Exploring Basic Filters Like Blur and Sharpen
Filters can add dramatic impact or subtle polish to your images. I started experimenting with blur filters to soften backgrounds and sharpen filters to enhance details.
Using Gaussian Blur on backgrounds helped me create depth and draw attention to the subject, while sharpening made textures pop. The trick is to use these sparingly—too much blur or sharpen makes images look fake or noisy.
Getting a feel for subtlety here really improved the quality of my edits.
Applying Layer Styles for Instant Enhancements
Layer styles like drop shadows, glows, and bevels are fantastic for adding dimension without complex editing. I used these styles to make text stand out or give objects a polished, professional look.
For example, adding a subtle drop shadow to a logo made it pop against busy backgrounds. The best part is you can easily toggle these styles on and off or adjust their settings live, which means you can experiment quickly and find the perfect effect.
Using Smart Filters for Flexible Editing
Smart Filters work like adjustment layers but for filters. By converting your layer to a Smart Object first, you can apply filters non-destructively and go back to tweak settings anytime.
This flexibility saved me when I wanted to try different looks without starting over. I recommend getting comfortable with Smart Filters early on because they offer creative freedom and protect your original image from permanent changes.
Basic Typography Skills for Stunning Text Design
Choosing and Pairing Fonts Effectively
Good typography can elevate your design instantly. When I began, I picked fonts that matched the mood of my project—like playful scripts for invitations or clean sans-serifs for business materials.
Pairing fonts means combining a headline font with a complementary body font, which creates visual harmony. Using too many fonts or clashing styles was my early mistake.
Sticking to 2-3 fonts and understanding their personalities helped me create balanced, readable designs.
Adjusting Text Properties for Impact
Photoshop lets you tweak text in many ways—size, spacing, alignment, and color. Learning to adjust kerning (space between letters) and leading (space between lines) made my text look professional rather than cramped or scattered.
I also experimented with effects like shadows or strokes to add emphasis. Playing with these properties gave me control over how my message was communicated visually, making sure text was not just readable but also eye-catching.
Converting Text to Shapes for Customization
Sometimes you want to get really creative with text by turning it into shapes that you can manipulate like any other graphic. I used this trick to warp letters, create outlines, or combine text with other design elements.
While you lose the ability to edit the text content afterward, this technique opened up new possibilities for unique typography effects. It’s a handy skill for designers who want to push beyond standard font options.
Tips for Troubleshooting Common Photoshop Challenges
Fixing Performance Issues and Lag
Photoshop can slow down if your computer isn’t optimized or if files get too heavy. I found that increasing RAM allocation in Photoshop preferences and keeping my scratch disk on a fast drive helped a lot.
Closing unnecessary background apps and working with smaller file sizes or lower-resolution previews also made the program snappier. These small tweaks saved me frustration during long editing sessions.
Recovering Lost Work and Avoiding Crashes
Nothing’s worse than losing hours of work. I got into the habit of enabling Auto-Save and saving versions regularly. Photoshop’s History panel lets you step backward through edits, which is a lifesaver when mistakes happen.
Also, saving frequently in PSD format ensures you keep all layers intact. If Photoshop crashes, reopening the last auto-saved version usually recovers most of your work, which eased my anxiety about experimenting fearlessly.
Dealing with Selection and Masking Errors
Sometimes selections don’t behave as expected, or masks don’t reveal what you want. I learned to check if I was on the correct layer or mask before editing.
Zooming in to work on edges and switching brush hardness helped improve precision. If selections felt off, redoing them with different tools or refining edges often solved the problem.
Patience and practice are key here—mistakes are normal, but knowing how to troubleshoot them keeps your project moving forward.
Conclusion
Photoshop might seem overwhelming at first, but breaking down its features step-by-step makes the learning curve much smoother. By familiarizing yourself with the interface, mastering essential tools, and organizing your workflow, you’ll gain confidence quickly. Remember, practice and patience are key to unlocking Photoshop’s full creative potential. With these tips, you’re well on your way to producing polished, professional designs with ease.
Helpful Information to Keep in Mind
1. Consistently save your work in PSD format to preserve layers and edits for future adjustments.
2. Customize your workspace to fit your personal workflow, which can greatly improve efficiency.
3. Focus on learning a few key tools first before gradually exploring more advanced features.
4. Use adjustment layers and masks for non-destructive editing, allowing greater flexibility.
5. Incorporate keyboard shortcuts into your routine to speed up repetitive tasks and improve productivity.
Key Takeaways
Understanding the Photoshop interface and its core tools is foundational to a smoother editing experience. Organizing layers and using masks help maintain a non-destructive and flexible workflow. Mastering selections and adjustment layers elevates the quality of your edits, while keyboard shortcuts and workspace customization boost your efficiency. Regular saving and troubleshooting skills ensure your work stays safe and uninterrupted. Embracing these principles transforms Photoshop from a daunting program into a powerful creative tool.
Frequently Asked Questions (FAQ) 📖
Q: uestionsQ1: What are the absolute basics I should learn first in Photoshop to avoid feeling overwhelmed?
A: Start with understanding the essential tools like the Move Tool, Brush Tool, and Selection Tools. Getting comfortable with layers and how they work is also crucial since almost every Photoshop project relies on layering.
From my experience, mastering these basics first made everything else easier to grasp. Spend some time practicing simple tasks like cropping, resizing, and applying basic adjustments like brightness and contrast.
This foundation will save you from frustration and speed up your workflow dramatically.
Q: How can I speed up my Photoshop learning process without getting stuck on complicated features?
A: Focus on one feature at a time and apply it in small, practical projects. For example, if you’re learning how to use masks, try editing a photo by selectively adjusting colors or removing backgrounds.
When I was learning, breaking down complex features into bite-sized exercises helped me retain information better and kept me motivated. Also, don’t hesitate to use shortcuts — they might seem tricky at first but once you get the hang of them, they significantly boost your efficiency.
Q: Are there any beginner-friendly resources or tips that helped you build confidence in Photoshop?
A: Absolutely! I found video tutorials on platforms like YouTube invaluable because they show real-time editing, which feels more like a conversation than reading a manual.
Another tip is to join online communities or forums where you can ask questions and share your progress. Personally, getting feedback from others and seeing their creative approaches inspired me to experiment more.
Lastly, don’t worry about perfection early on — practice consistently, and your confidence will grow naturally.