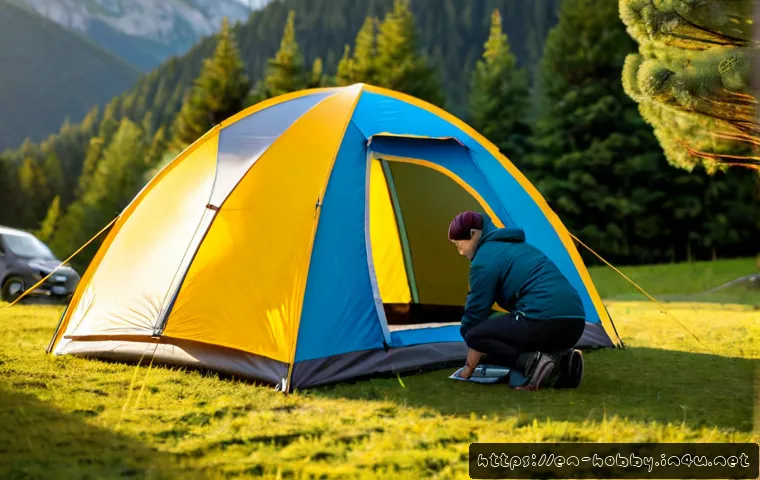
A secure tent setup starts with high, level ground, properly angled stakes, and a rainfly that is tensioned without touching the inner tent. Choose a tent that fits your group, vehicle space, expected weather exposure, and how quickly you want to pitch camp.
A basic dome tent may be enough for occasional car camping, while a faster-pitch, larger, or weather-focused model can be worth comparing for family trips and repeated use.
Set out every component before assembly so missing stakes, poles, or guylines do not slow down the process. Check campground placement and fire-safety rules before choosing a spot.
A few careful steps before moving gear inside can help prevent pooling water, unstable corners, and overnight condensation.
At a Glance
- Choose high, level ground rather than a low spot or drainage path.
- Drive stakes away from the tent, with each stake head leaning back toward the tent.
- Use and tension the rainfly so it protects the tent without pressing against the inner fabric.
| Tent style | Setup approach | Space and use | What to compare before buying |
|---|---|---|---|
| Dome tent | Usually uses a pole-based setup | A practical option for many general camping trips | Capacity, pole design, rainfly coverage, and ventilation |
| Cabin tent | May involve more parts and more campsite planning | Useful when interior room and family organization matter | Vehicle space, door layout, packed size, and setup complexity |
| Pop-up tent | Designed around a quicker pitch process | Worth considering for short weekend trips or simple campsite setups | Storage size, weather protection features, and included stakes |
| Backpacking tent | Typically selected with packed size and carrying needs in mind | Best compared for travel where gear space matters | Pole materials, packed size, footprint options, and ventilation |
The Fastest Way to Set Up a Tent Securely
The fastest reliable method is not rushing the poles. Start by choosing the site, organize every component, and inspect the tent before your sleeping gear goes inside. This order makes it easier to spot a poor location or a missing piece while you can still make a simple correction.
Pick High, Level Ground Before Unpacking
A level campsite improves sleeping comfort and helps reduce the chance of water pooling inside the tent. Avoid low areas and visible drainage paths, especially if rain is possible. Look at the ground before spreading out your gear, then confirm that the space fits the tent without forcing it into a cramped or unsuitable position.
Also check campground rules. Some campgrounds limit tent placement, ground disturbance, fire locations, or camping to designated areas. A site that looks convenient may still have restrictions that affect where you can stake, tarp, or place a larger shelter.
Lay Out the Tent, Footprint, Poles, and Stakes in Order
Place the footprint or ground cloth first, then lay the tent body on top. A footprint can help protect the tent floor from abrasion and moisture. Keep it inside the tent perimeter rather than allowing edges to stick out, where they may collect water and direct it beneath the floor.
Before assembling poles, put poles, stakes, guylines, and the rainfly where you can see them. This simple staging step is useful for first-time campers and families because it separates the pitching process from later tasks such as unloading bags, arranging lights, and setting up sleeping space.
Stake, Tension, and Inspect Before Moving Gear Inside
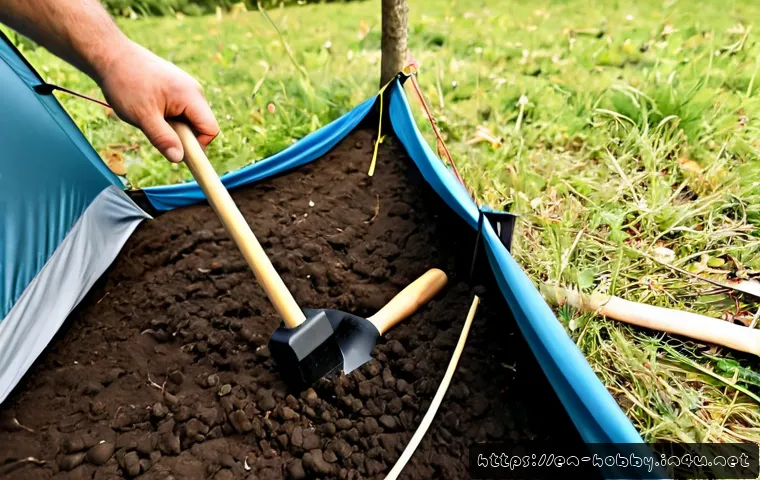
Stakes hold best when driven at an angle away from the tent, with the stake head leaning toward the tent. After the main structure is standing, check each corner and tension point before moving equipment inside. If conditions call for them, use the tent’s recommended stakes and guylines rather than assuming the tent will stay stable with only a few corners secured.
Finish by fitting the rainfly. It should be tensioned for weather protection while remaining clear of the inner tent fabric. Direct contact can reduce the separation that helps the fly do its job.
Choose a Tent That Matches Your Camping Style and Setup Time
The best tent is not simply the largest or the fastest-opening model. It is the one whose capacity, packed size, pole design, weather features, and ventilation fit the way you actually camp.
Dome vs. Cabin vs. Pop-Up vs. Backpacking Tents
A dome tent is often a straightforward choice for general camping. A cabin-style tent may deserve a closer look when a family wants more room to organize sleeping areas, bags, and entry traffic. A pop-up tent can appeal to campers who prioritize a quicker pitch for a short trip. A backpacking tent is commonly compared for its packed size and portability.
Do not rely on the category name alone. Two tents with the same stated capacity may have different usable floor space, door arrangements, rainfly coverage, and pole systems. Read the product details and setup instructions before making a tent comparison.
What to Compare: Capacity, Packed Size, Pole Design, Rainfly Coverage, and Ventilation
Start with who will sleep inside and what else needs to fit there. For family camping, it can be useful to consider space for bags and nighttime movement, not only sleeping positions. Then compare packed size against available vehicle space and compare the pole design against your comfort with setup.
For weather planning, look closely at rainfly coverage and ventilation features. Ventilation can reduce condensation, particularly in humid, cool, or rainy conditions. A tent with airflow options may be easier to manage overnight than one that must remain tightly closed with little air movement.
When Paying More for Quicker Setup or Weather Protection May Be Worthwhile
A premium tent or gear bundle may add value when setup speed, repeated family use, or weather-focused features are important to you. It may also be worth comparing paid campsite setup services where they are available and where a camper prefers help with a larger or more involved tent arrangement.
For occasional fair-weather use, a basic tent with sound staking, a suitable footprint, and a correctly fitted rainfly may be enough. The useful question is not whether an upgrade is universally necessary; it is whether its features solve a real issue in your own camping routine.
Avoid Common Setup Mistakes That Cause Leaks or Instability
Most campsite problems begin with a few preventable choices: pitching in the wrong place, leaving the ground cloth exposed, skipping anchoring steps, or closing off all airflow.
Do Not Pitch in a Low Spot or Drainage Path
Low ground can collect water. Choose a level area that is not part of a drainage path, even if it seems like the easiest open space at the campsite. This decision should happen before the tent is unpacked, not after the tent is fully assembled.
Keep the Footprint Inside the Tent Perimeter
A footprint or ground cloth can protect the tent floor from moisture and abrasion. Keep it contained beneath the tent rather than extending past the edges. An overhanging ground cloth can create an unwanted surface where water may collect.
Use All Recommended Stakes and Guylines When Conditions Require Them
Do not treat stakes as optional accessories. They are part of the tent’s secure setup. In exposed or windy conditions, follow the tent’s recommended staking and guyline points, and inspect the tension after the tent is standing.

Leave Airflow Paths Open to Limit Condensation
Condensation can be more noticeable during humid, cool, or rainy conditions. Use available ventilation features and avoid blocking intended airflow paths with gear. Rain protection and ventilation should work together rather than forcing an all-or-nothing choice.
Adjust Your Setup for Rain, Wind, and Family Camping
Conditions can change after arrival, so a good tent setup leaves room for small adjustments. Recheck the site, rainfly, stakes, and entry area when weather or campsite activity changes.
Rainy Conditions: Drainage, Fly Tension, and Dry Entry Habits
For a rainy weekend, site selection matters first. Avoid low spots, use a footprint correctly, and make sure the rainfly is tensioned without resting on the inner tent. Keep wet items managed near the entry so they do not crowd ventilation or soak the sleeping area.
Windy Conditions: Tent Orientation, Guylines, and Sheltered Placement
In wind, look for a sheltered placement that remains within campground rules. Use the tent’s staking and guyline system when conditions require it, then inspect tension as needed. Do not assume a particular model is appropriate for severe weather; check the manufacturer’s guidance for that tent.
Family Campsites: Space Planning, Doors, Storage, and Nighttime Safety
Family camping benefits from a clear layout. Keep doors accessible, assign a place for bags, and avoid blocking routes in and out of the tent. Position lighting so the entry and nearby walking area can be used safely at night without creating clutter inside the sleeping space.
Essential Tent Setup Gear and What Each Item Is Worth
A tent is easier to pitch when its supporting gear is ready. The right items are often simple: secure stakes, a way to place them, guylines, a footprint, a repair kit, and practical lighting.
Stakes, Mallets, Guylines, Footprints, Repair Kits, and Lighting
Stakes anchor the tent. A mallet can help place stakes without improvising. Guylines support the tent where its design calls for them. A footprint helps protect the floor, while a repair kit is worth keeping with the tent rather than somewhere else in the vehicle. Lighting helps make setup and nighttime movement easier to manage.
Budget Gear Versus Durable Upgrades for Frequent Campers
For occasional camping, focus on having complete, compatible gear and knowing how to use it. Frequent campers may want to compare durable replacement stakes, pole materials, repair options, and tent bundles that include a footprint or other useful setup pieces. Check what is actually included rather than assuming every tent package contains the same accessories.
Check Campground Rules Before Bringing Anchors, Tarps, or Large Shelters
Ground disturbance, tent placement, fire safety, and designated camping areas may be regulated by the campground. Confirm the local rules before bringing anchors, large tarps, or extra shelters. Reservation requirements and available setup services also vary by location.
Selection Criteria and Comparison Summary
Before choosing a tent or upgrade, check group size, available vehicle space, expected weather exposure, setup complexity, and the rainfly, ventilation, footprint, and stake options included with the product. Compare pole materials, waterproof ratings, and included footprint options on the relevant product page. For campground services, official campground information is the best place to confirm setup availability and site-specific conditions.
Final Thoughts
A faster tent setup comes from preparation more than speed. Choose the site before unloading everything, stake the tent correctly, and check rainfly tension before settling in. For families and first-time campers, a simple system for gear, doors, and lighting can make the campsite easier to use. Match the tent and accessories to your trip rather than paying for features you are unlikely to need.
Useful Things to Know
1. A level site can improve comfort and reduce the risk of water pooling inside the tent.
2. A footprint helps protect the tent floor from abrasion and moisture.
3. Ventilation can help reduce condensation in humid, cool, or rainy conditions.
4. Rainfly tension should provide coverage without pressing directly against the inner tent.
Important Considerations
Weather, soil, wind, temperature, campsite rules, and tent suitability vary by location and model. Check the tent manufacturer’s instructions for setup and weather guidance, and confirm local campground regulations before arrival. Do not assume a tent is suitable for severe weather or that a campsite offers reservation, setup, or equipment services without verifying those details directly.
Frequently Asked Questions
Q1. Should I buy a larger tent than the number of people sleeping in it?
A1. Consider how much interior space you need for sleeping gear, bags, entry access, and family movement. Compare the stated capacity with the floor layout, doors, packed size, and available vehicle space before deciding.
Q2. Are pop-up tents worth it for family camping or weekend trips?
A2. A pop-up tent may be worth considering when quicker setup is a priority. Compare its storage size, rainfly coverage, ventilation, staking options, and usable space against your family’s camping needs.
Q3. How can I keep a tent from leaking during rain?
A3. Start with high, level ground away from drainage paths. Keep the footprint within the tent perimeter, use the rainfly, and tension it so it does not press against the inner tent fabric. Check the tent’s setup instructions and inspect stakes and guylines as conditions change.