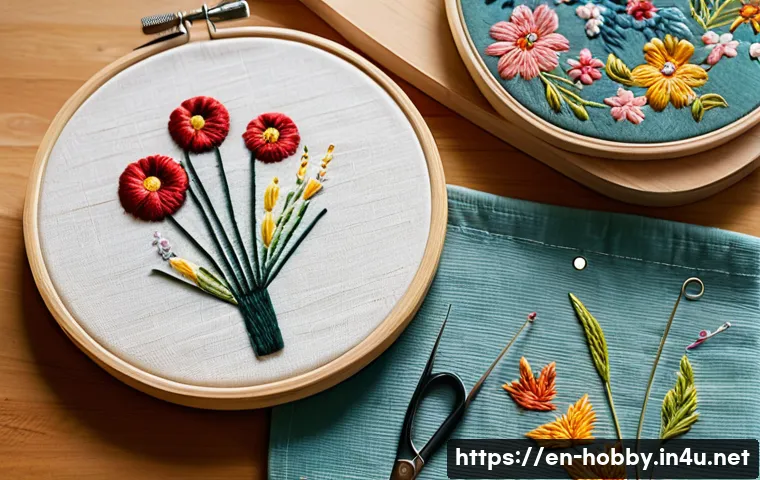
Embroidery is more than just a craft—it’s a timeless art form that weaves creativity, tradition, and personal expression into every stitch. From delicate floral patterns to bold geometric designs, embroidery has evolved across cultures and centuries, reflecting unique stories and styles.
Whether you’re a beginner eager to learn or an experienced artist looking to refine your technique, understanding the basics and nuances of embroidery can open up a world of creative possibilities.
I’ve found that exploring different stitches and materials not only enhances the final piece but also makes the process incredibly rewarding. Let’s dive deeper and uncover the fascinating techniques behind embroidery—I’ll guide you through every step to master this beautiful skill!
Exploring Essential Materials and Tools for Embroidery
Choosing the Right Fabric for Your Project
When I first got into embroidery, picking the perfect fabric felt like a puzzle. It turns out, the fabric you choose shapes the entire stitching experience and the final look.
Cotton and linen are classic favorites because they have a smooth surface that holds stitches well without puckering. If you want a bit of texture, canvas or denim offers a sturdier base, perfect for bold, graphic designs.
On the flip side, delicate fabrics like silk or organza require extra care and finer needles, but they lend an elegant touch to any piece. My advice? Start with medium-weight fabrics if you’re new, then experiment as you grow more confident.
Essential Needles and Threads: What Works Best
The needle is your trusty companion in embroidery, and its size and type directly impact how smoothly your stitches flow. I remember struggling with a needle too thick for my fabric, which led to frustrating snags.
Generally, embroidery needles with a sharp point and a longer eye are ideal because they accommodate embroidery floss easily. Speaking of thread, cotton floss is the go-to for most projects due to its versatility and vibrant color range.
However, silk threads bring a luxurious sheen, and metallic threads add sparkle but can be a bit tricky to work with. I find it helpful to have a variety of threads on hand to match different project needs and textures.
How to Organize Your Tools for Maximum Efficiency
Keeping your embroidery tools organized can surprisingly boost both your productivity and enjoyment. I set up a small caddy with compartments for threads, needles, scissors, and hoops.
This way, I don’t waste precious time hunting for items mid-project. Using thread organizers or bobbins helps prevent tangling and makes color selection smoother.
Plus, storing needles in a magnetic pin holder prevents accidents and keeps them handy. When I streamlined my workspace, I noticed how much more relaxed and focused I felt while stitching, which improved the quality of my work.
Mastering Foundational Stitches That Every Embroiderer Should Know
Getting Comfortable with the Running and Back Stitch
The running stitch is the most basic and versatile stitch, great for outlining or creating simple patterns. I often use it for quick borders or when I want a delicate, dashed line effect.
The back stitch, however, is sturdier and perfect for detailed outlines and lettering. When I first learned the back stitch, it felt a bit awkward, but after some practice, it became my go-to for clean, sharp lines.
Both stitches are the backbone of many embroidery projects and mastering them opens up a lot of creative doors.
Adding Texture with Satin and French Knot Stitches
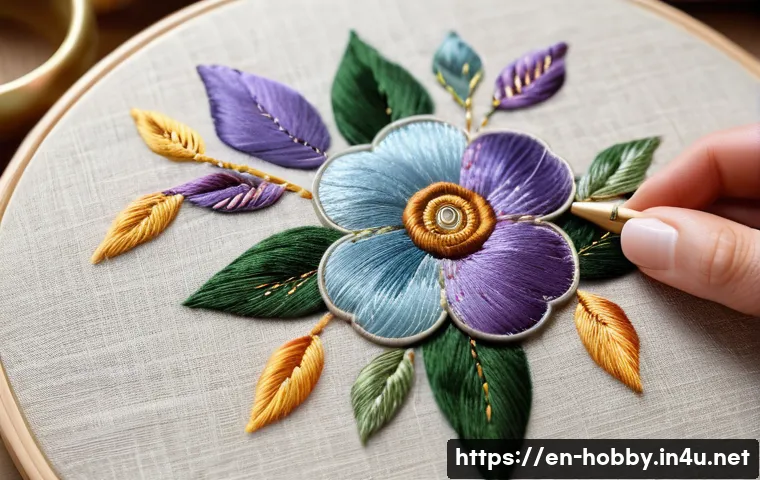
Satin stitch is a game-changer when you want to fill shapes with smooth, solid color. I recall the satisfying feeling of watching a simple circle transform into a shiny, satin-like petal on my floral designs.
It takes patience to keep the stitches neat and consistent, but the payoff is worth it. French knots, on the other hand, add delightful pops of texture and dimension.
I like using them to create flower centers or scattered dots that bring a design to life. Initially, they can be a bit tricky to master, but once you get the hang of wrapping the thread just right, they become a charming detail to sprinkle throughout your work.
Understanding When to Use Chain and Stem Stitches
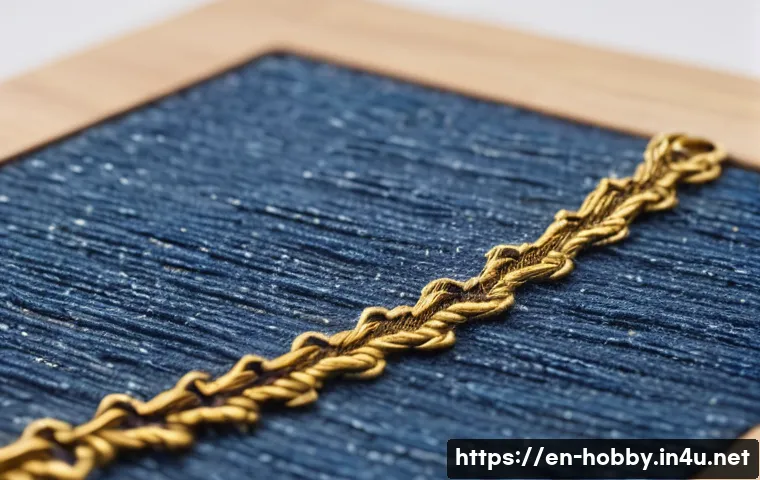
Chain stitch produces a lovely looped effect, almost like a linked chain, making it fantastic for decorative outlines or creating bold, flowing lines.
I often use it to give a vintage vibe to my projects. Stem stitch, with its slightly twisted appearance, mimics the look of a rope and is perfect for stems or curved lines.
It provides a smooth yet textured line that adds elegance to floral or script designs. Both stitches require a bit more control and rhythm, but they add a distinctive flair that elevates embroidery from simple to stunning.
Incorporating Color Theory to Elevate Your Embroidery Designs
Choosing a Color Palette That Tells a Story
Color choice can make or break an embroidery piece. I’ve learned that selecting colors that complement or contrast thoughtfully can bring depth and emotion to your work.
For instance, warm tones like reds and oranges evoke energy and warmth, while cool blues and greens create a calming effect. When I plan a project, I often start by choosing one dominant color and then build around it with analogous or complementary shades.
This approach keeps the design cohesive yet visually exciting.
Using Gradients and Blending Techniques
Creating smooth color transitions can transform flat embroidery into a vibrant, dynamic artwork. I experimented with blending different shades of thread in satin or long-and-short stitches to achieve a gradient effect.
It’s a bit like painting with thread, requiring patience and layering, but the result is stunning. Whether you’re working on a flower petal or a sky background, these techniques add realism and depth that really catch the eye.
How Contrast Enhances Detail and Dimension
Incorporating contrasting colors can highlight specific areas and make your design pop. For example, pairing dark outlines with lighter fills or using bright thread against a muted fabric background can dramatically increase visual impact.
I like to use contrast strategically to guide the viewer’s eye and emphasize key elements in my embroidery. It’s a simple trick that adds a professional touch and brings your work to life.
Understanding Fabric Preparation and Finishing Techniques
Prepping Your Fabric for Flawless Stitching
Before the needle even touches the fabric, prepping the material sets the stage for success. Washing and ironing your fabric removes sizing and wrinkles, which helps the stitches sit smoothly.
I always stretch the fabric tightly in an embroidery hoop to prevent puckering, which can ruin even the most carefully executed stitches. Securing the fabric tautly is essential, and I’ve found that switching hoops mid-project can refresh tension and keep my work neat.
How to Transfer Patterns Accurately
Transferring your design onto fabric is a crucial step, and there are several methods to try depending on your project. Lightbox tracing works well with lightweight fabrics, while water-soluble pens offer a neat option that disappears after washing.
I’ve also used transfer paper for more complex patterns, which ensures precision but requires a steady hand. Whichever method you choose, practice makes perfect in transferring patterns cleanly without distorting the design.
Finishing Touches to Preserve and Showcase Your Work
Once the embroidery is complete, finishing techniques protect your art and prepare it for display or use. Gently washing and ironing the piece removes any marks and smooths out the fabric.
I often back my embroidery with felt or interfacing to add support, especially for items like patches or bags. Framing or mounting your work behind glass not only showcases it beautifully but also keeps it safe from dust and damage.
Taking these extra steps has made me appreciate my finished pieces even more.
Exploring Advanced Techniques for Unique Embroidery Effects
Incorporating Beads and Sequins for Extra Sparkle
Adding beads or sequins can instantly elevate a simple embroidery into something dazzling. When I first tried beading, it was a bit fiddly, but the tactile contrast and shimmer brought a whole new dimension to my projects.
Whether you’re outlining a motif or filling an area with sparkle, these embellishments add texture and catch the light beautifully. Just keep in mind that they can make the fabric heavier and sometimes less flexible.
Experimenting with 3D Embroidery and Raised Textures
Three-dimensional embroidery techniques like stumpwork or padded stitches add depth that really makes your design stand out. I found that layering stitches with padding underneath creates a sculptural effect that’s both fun and impressive.
It’s like giving your embroidery a life of its own, perfect for nature-inspired motifs like flowers or animals. While these methods require patience and precision, the tactile and visual impact is well worth the effort.
Combining Mixed Media to Push Creative Boundaries
I’ve enjoyed mixing embroidery with other art forms, like fabric painting or appliqué, to create truly unique pieces. Adding paint accents or layering fabric shapes before stitching opens up endless creative possibilities.
It’s a fantastic way to break free from traditional embroidery and explore personal expression. This fusion approach invites experimentation and can lead to unexpected and exciting results.
Comparing Popular Embroidery Styles from Around the World
Distinctive Features of Traditional Styles
Different cultures have contributed rich embroidery traditions, each with unique motifs and techniques. For example, Japanese sashiko uses repetitive geometric patterns primarily for reinforcement, while Indian zardozi involves luxurious metallic threads and elaborate designs.
I’ve always admired how these styles tell stories and reflect cultural heritage. Exploring them not only broadens your skill set but also deepens your appreciation for the art form’s diversity.
How Contemporary Embroidery Is Shaping Modern Art
Modern embroidery artists often blend traditional stitches with contemporary themes, creating fresh and sometimes provocative works. I’ve seen embroidery used to comment on social issues, pop culture, or personal narratives, turning it into a powerful storytelling medium.
This shift is exciting because it pushes embroidery beyond craft and into the realm of fine art, inviting new audiences and inspiring innovation.
Choosing a Style That Resonates with Your Personal Vision
With so many styles to explore, finding one that aligns with your interests and voice is key. I experimented with various techniques before settling on a blend of traditional and modern stitches that suit my aesthetic.
The best advice I can give is to try different styles without pressure, and allow your personal creativity to guide you. Over time, your unique embroidery style will emerge naturally.
| Embroidery Material | Best For | Pros | Cons |
|---|---|---|---|
| Cotton Fabric | Beginners, general projects | Easy to work with, widely available, affordable | Can wrinkle easily |
| Linen Fabric | Traditional, detailed work | Durable, smooth surface, natural look | More expensive, requires ironing |
| Silk Thread | Luxury embroidery | Shiny, smooth finish | Delicate, prone to fraying |
| Cotton Floss | Most projects | Vibrant colors, versatile | Can tangle easily |
| Metallic Thread | Decorative, highlights | Adds sparkle and texture | More difficult to stitch with |
| Embroidery Needle | All projects | Sharp point, long eye for floss | Needs to match fabric thickness |
글을 마치며
Embroidery is a beautiful blend of creativity, technique, and patience. By understanding the essential materials, mastering foundational stitches, and exploring color theory, you can elevate your projects to new heights. Remember, practice and experimentation are key to developing your unique style. Whether you’re a beginner or an experienced stitcher, the joy of embroidery lies in the journey as much as the finished piece.
알아두면 쓸모 있는 정보
1. Choosing the right fabric is crucial; medium-weight cotton or linen is ideal for beginners to avoid puckering and frustration.
2. Always match your needle size to your fabric thickness to ensure smooth stitching without damaging the material.
3. Organizing your tools with a dedicated caddy and using bobbins for thread management saves time and reduces stress during projects.
4. Experiment with color palettes by combining complementary or analogous shades to create designs that evoke emotion and depth.
5. Finishing techniques like washing, ironing, and backing your embroidery help preserve your work and prepare it for display or use.
중요 사항 정리
Successful embroidery depends on selecting appropriate materials and tools tailored to your project’s needs. Mastering basic stitches lays the groundwork for more complex designs, while thoughtful use of color and texture enhances visual appeal. Proper fabric preparation and neat finishing techniques not only improve the final look but also extend the longevity of your work. Lastly, organizing your workspace boosts efficiency and enjoyment, making the creative process smoother and more rewarding.
Frequently Asked Questions (FAQ) 📖
Q: What are the essential materials needed to start embroidery as a beginner?
A: When I first dipped my toes into embroidery, having the right materials made all the difference. At a minimum, you’ll want a quality embroidery hoop to keep your fabric taut, embroidery needles suited for your thread thickness, and embroidery floss in various colors.
Cotton fabric like muslin or linen is perfect for beginners because it’s easy to work with. Also, having small scissors for precise cutting and a water-soluble fabric marker or pencil to sketch your design will set you up for success.
Starting with these basics keeps things simple and helps you focus on mastering stitches without getting overwhelmed.
Q: How long does it usually take to learn basic embroidery stitches?
A: From my experience, picking up the fundamental stitches like the running stitch, backstitch, satin stitch, and French knot can take anywhere from a few days to a couple of weeks, depending on how much time you dedicate.
I found that practicing for just 15 to 30 minutes daily made a huge difference. The key is consistency rather than speed. As you become comfortable, you’ll naturally start combining stitches into more intricate designs.
Remember, embroidery is as much about the journey as the finished piece, so enjoy the process without rushing.
Q: Can embroidery be a profitable hobby or even a small business?
A: Absolutely! I’ve seen so many crafters turn their passion for embroidery into a side hustle or full-time gig. Custom embroidered items like patches, personalized gifts, or even home decor pieces have a strong market.
What helped me was building a portfolio on social media and platforms like Etsy to showcase my work. Pricing your pieces fairly by factoring in materials, time, and skill is crucial.
Plus, adding unique touches or signature styles can set you apart. With patience and marketing, embroidery can definitely bring in a nice supplemental income or blossom into a rewarding business.